Friday 29 August 2014

First sail!

Went for a sail today, to check everything out. Sorry, no sailing pics; too busy.


The bow is high, as I didn't ship the ballast, which sits forward. And, because it was so windy when we arrived at the ramp, I didn't step the mizzen, either. When we got out into it, the water was lumpy from wind but the wind softened as we sailed. She definitely has lee helm in this configuration; needs the mizzen. Went along okay considering the conditions. The rudder blade needs lead but otherwise worked fine. The port daggerboard would not go into its slot, so a bit more work is needed.


 Back to John's.

Most of the work is done, though (notice the painted boom), so now I can rest while waiting for a response from the marina. And have poutine.

Looking forward to sailing in a nice breeze with all sails set, no chop.
Dreaming?


Monday 25 August 2014

Bottom done!

Finally! 
I think Starchy & I eyeballed it well. Not perfect, but good enough for her. I expect the waterline is way high, but I'd rather it high than low.

Boom paint, making things

The boom got its second coat of paint today.
The photo is from yesterday, with the first coat on, in the shade on a hot late afternoon. I'm using the "sand" colour that I started painting the mast with. Hopefully I have enough of the buff paint left for the last coat tomorrow. The mast paint scheme was the same; I found the buff after not liking this sand colour on the mast after two coats.

I did end up taking the blocks off the boom, as you can see in the photo above. Now I need to make sure I can put them back together!
 
* * *

I made an extension tiller from the oak trim left over from doubling the cabin beams.
It reminds me of one I used in my youth. Was it on Firecracker?
It will be attached to the tiller with elastic cord. You'll see.
 
Not too much to do until Starchy shows up, so I followed John's suggestion and made a push stick to aid in lifting the mast:


The mast is raised while standing in the cockpit at the aft end of the cabin. The first few feet are the hardest on the lifting rig (A-frame), so I hand it up as far as I can reach to start. Now I'll be able to reach it up farther. This won't get painted unless and until it's proven its worth. Notice the apostrophes in the right places. Don't get me started!

Lots of rope work is happening. Tomorrow Starchy and I will figure out the cockpit cover.


Sunday 24 August 2014

More rigging

All sails set!


The luff of the mainsail is a bit long for the mast/gooseneck configuration, so I decided to tie the halyard to the peak in a way that takes up as little height as possible. I believe this will hold fine:
It's a simple overhand stopper knot on the end of the line and the same around the peak plate. The braided line binds well on itself. The gooseneck is fixed, so tightening with a down-haul is out.

I replaced the over-sized sheave for the jib halyard with a smaller store-bought one, which allows me to tighten the bolt that pins the bottom of the mast in the tabernacle:
The white plastic 'donut' is standing in for a sheave for the topping lift. It's attached to the mast with nylon webbing and an over-sized screw through holes that were melted into the webbing with a hot nail. The topping lift for the mizzen boom got a similar treatment, with the donut higher up the mast:
The topping lift on the mizzen will keep the boom from trailing in the water when the sail comes down. It also allows me to pull the mizzen boom right up against the mast to de-power it if I want, or to roll up the mizzen to tie it to the mast.
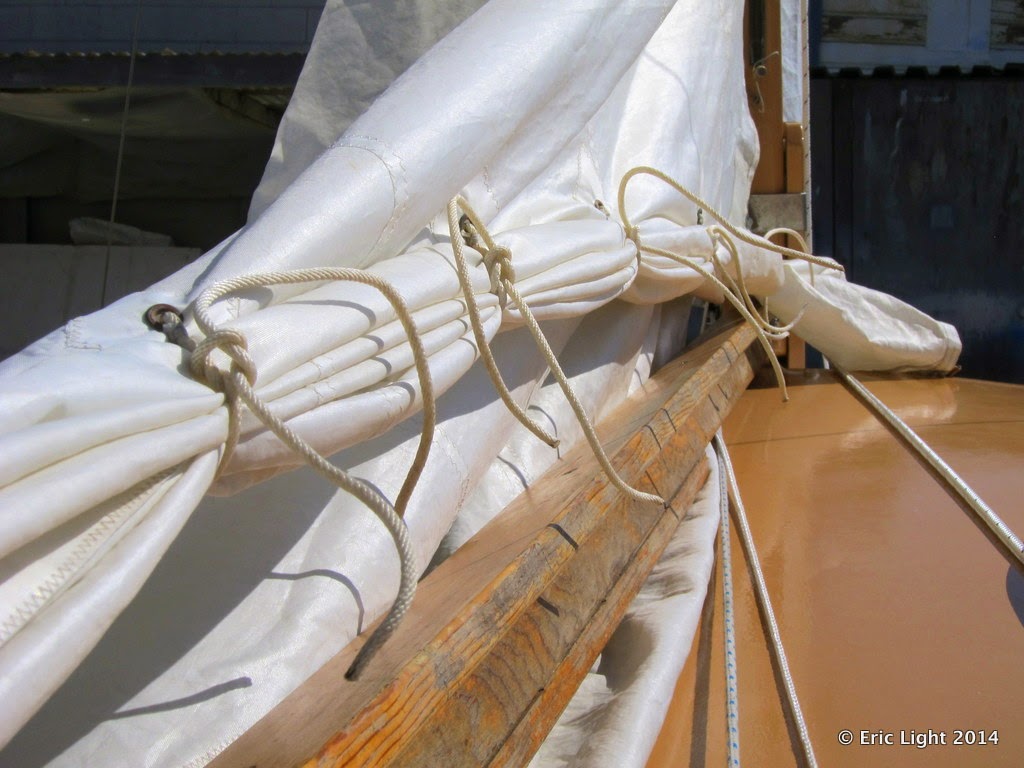
On the main boom in the photo above (note the square corners), the top line is the topping lift, the next down is the main outhaul, the lines underneath are the main sheet:
The dock line cleats are being used as fairleads for the mizzen sheets.

 Reefing

 
Checking out the reefing, I realized it needed jiffy reefing capability.
 Not a huge reef, but...

...tying up the reef lines while sitting on the cabin top in big seas will not be easy!

Again I used plastic donuts and nylon webbing for sheaves. Works fine in the yard; we'll see how it goes at sea.
 I bought the cam cleats at the mariner's flea market in the spring. The reefing out-haul donut is attached under the boom so it won't interfere with the boom tent.
Donut at the reef tack:

Painting & whipping centre:

Finally installed the ladder!
It doesn't interfere with the mizzen sheets, thankfully.
The little cleat beside the rudder gudgeon is a quick-release cleat for the rudder blade down-haul. When there's too much force on it, it snaps open, allowing the blade to float up. Works fine in testing.

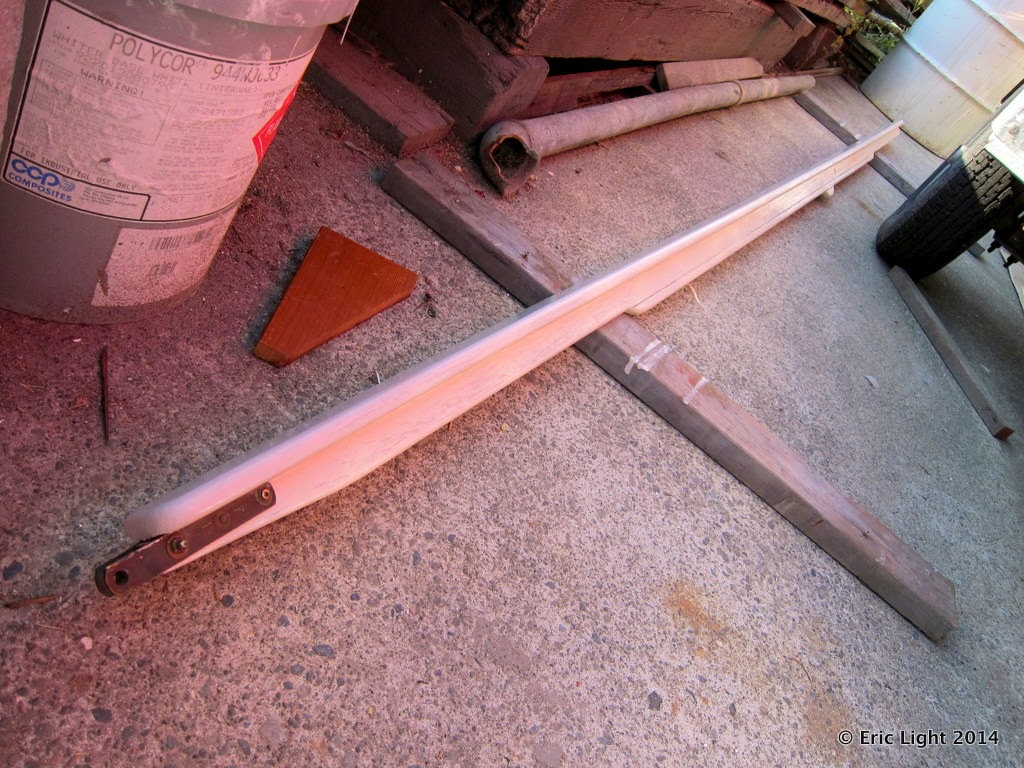
As per Godfrey's instructions I've been rounding corners off. Well, it suits my aesthetic, certainly. Now I'm working on the boom. Its age and lack of care have meant that splinters are everywhere. Hopefully, sanding and painting will cure that.


Not finished! The boom had to go back on for the night before it was done. Hopefully today I'll finish sanding and get the first coat of paint on it. I'm debating whether to re-do the block attachment lines. It would be nice if I could round the corners of those holes...

Wednesday 20 August 2014

Rudder together, friggin with the riggin

Super tiller catch!

Work on the rudder is done. Down-haul & up-haul lines are next, to swing the blade.

Work on the rigging proceeds. On the mizzen, the halyard and topping lift are done; new stays were made from Amsteel Blue, new turnbuckles bought. I learned how to splice the Amsteel Blue from a fellow at Trotac, and got good at it.

On the main, a new pulley for the jib halyard on the mast means the bolt that goes through the bottom of the top part of the mast can be tightened properly. New stainless bolts, top and bottom:

The marina manager is away until the end of the month, so launch won't happen until then.
I took the battens out of the mizzen so that it could be rolled up. I'll keep them but probably won't use them, as I don't think they're necessary. I'm waiting for a calm day to hoist all sails together.


Friday 15 August 2014

Bottom paint

First coat of bottom paint went on today. It took just over half of a quart of Petit Horizons.
I'll have to buy another quart. I want to put at least two coats on, and three if I can stand it. It took two hours. It was difficult to reach up into the daggerboard boxes because of the fenders, but not impossible.
That white definitely must go; it's too small.

Sometimes I feel like this is a dream and the bubble will soon pop!

Thursday 14 August 2014

Lifted Up!

Starchy helped me lift Firefly up and tape her waterline. The waterline is adequate—I decided not to be too fussy about it. Just want to go sailing! The darker green tape is the splash guard.
There's just enough room now between the bunk and the hull to put my hand in and sand, or use a small roller. I also patched a small hole that must have come from something getting caught between the bunk and the hull.

(I need to add more rubber pads to the tops of the drums and move them out a bit.)
The boat is not resting on the block in the foreground; that's just a backup for the jack, which you can just see behind it. The pads on the drums are for stabilizing, not load-bearing.

I brought the waterline up almost two inches, and more at the bow, which I hope the ballast will compensate for. There's not as much white showing as I thought there would be, so I'm considering painting it red.
Her bottom is all sanded now, and waiting for the epoxy patch to kick so it can be painted.


Tuesday 12 August 2014

Metal boat bits

John Booth made me a nice tiller catch:
It attaches to the side of the rudder and keeps the tiller attached, since it's only held to the rudder with a bolt at its after end. It allows the tiller to be pivoted on the bolt and still useful for steering.

Here are some of the backing plates for the handrails:
This also shows the doubled cabin top beams. The second beam has a handrail bolt secured through it. There are six bolts securing each handrail.

Tabernacle Collar

Here's the original piece of metal securing the top parts of the tabernacle sides:
You can see that the starboard side has a split in it. Not good. So John made me a tabernacle collar out of some sturdy stainless:
It wraps around to the forward side of the tabernacle, holding the boards together against splitting:

New Feet for the A-frame

I wanted to be able to raise the mast with the stays still attached to the chainplates, so I opened a pre-existing hole below the stay attachment hole for the A-frame to seat in. Trouble was, I couldn't put the nut on the bolt because the hole was too close to the deck. So I bent some stainless ready rod and used it without a nut:
The hook keeps the rod in the hole on the chainplate. A bonus that comes with that is that now I can attach the A-frame pieces to the chainplates while standing on the deck, with no need to crouch down and fiddle with a nut.
The stays will be attached to the chainplates with Spectra line, not the stretchy nylon in the photo.

Tomorrow we lift Firefly up into the air to tickle her bottom.


Sunday 10 August 2014

Hand rails, raised mast, tent

Thanks again to Starchy for his help. The handrails were hot work in the sun, but they went on real easy. The hard part was making all the backing plates and fastening them on the inside first, which I had done over the course of the previous two days. Backing plates are 5" circles of ⅜" ply, needed because the cabin roof is only ⅛" ply.
As Starchy said, the handrails provide more strength to the cabin top. I like to think of them as an exoskeleton.
 
Once the rub rails were on, with the chain plates embedded, then I could finally raise the mast.
It was a little scarey because the ground is not level and the mast wanted to go sideways. The 5:1 purchase block & tackle worked a treat, though.
I noticed that some of the joints in the tabernacle had opened up a little from the stress of the mast wanting to go sideways—what fresh paint tells you! So I think I have to beef up the tabernacle somehow.
 
Once the mast was up, I could see if the tent poles were the right size to go over top of the boom:
You can see the decktodes are finally being utilized.

This is the boom tent that came with the boat. It almost fits. I'll use it to keep the sun off the top of the transom so I can finally paint it.

TIFN